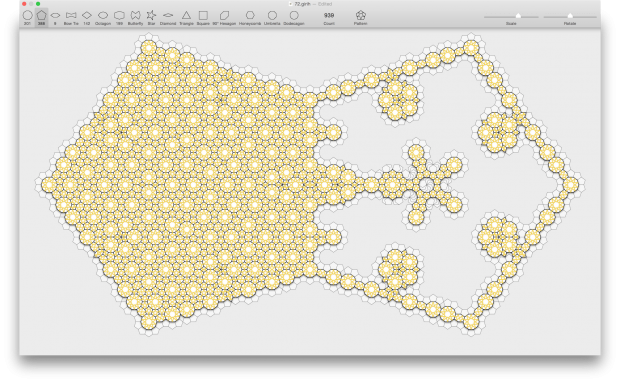
To create even easier ornaments, than with the laser cutted Girih tiles, I decided to write a specialized App for it.
An App has some advantages to the physical tiles:
Physical tiles tend to move around a bit, when you release your fingers or add another piece.
Loose tiles can not be durable stored as ornament.
The number of physical tiles is limited.
The look and size of physical tiles is fixed.
You can not seamless join physical tiles.
Download the Girih App

Version 3.2 from March 2025.

This App is completely written in Swift.
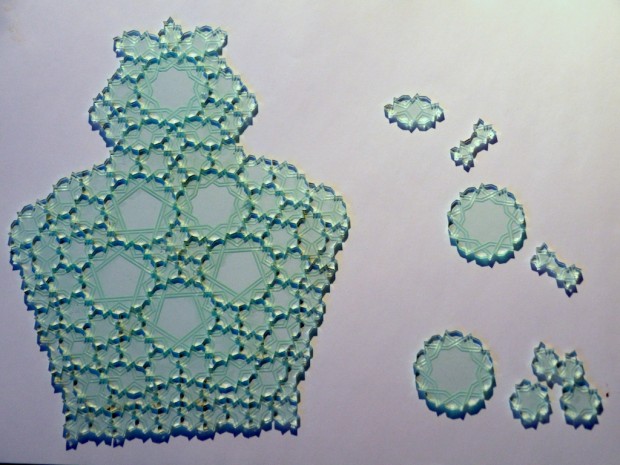
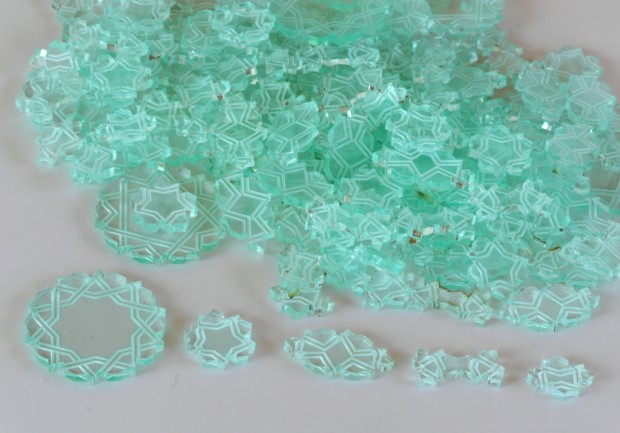
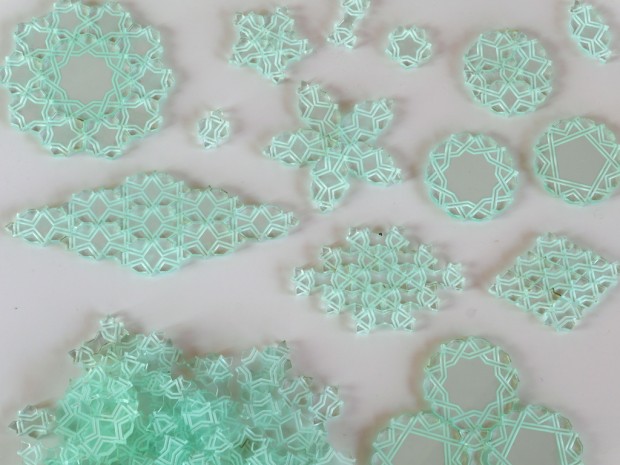
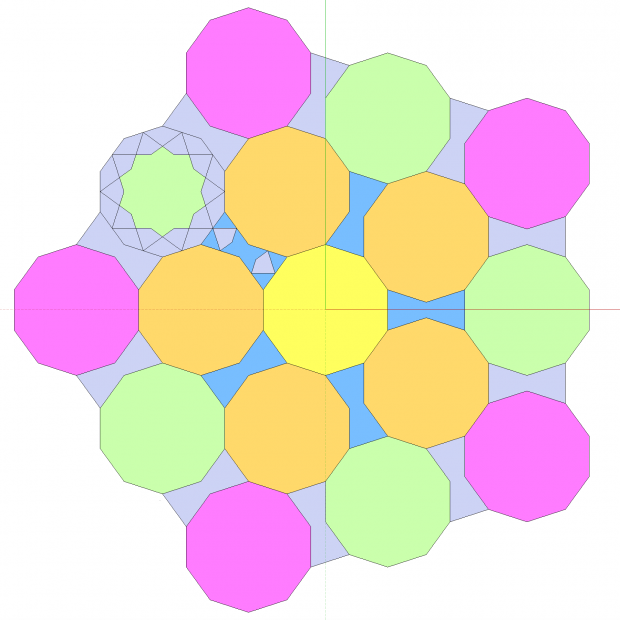
As an addition to the standard Girih shapes: Decagon, Pentagon, Hexagon, Bow Tie and Rhombus at added some more shapes.
Not all of the shapes can be combined together without gaps.
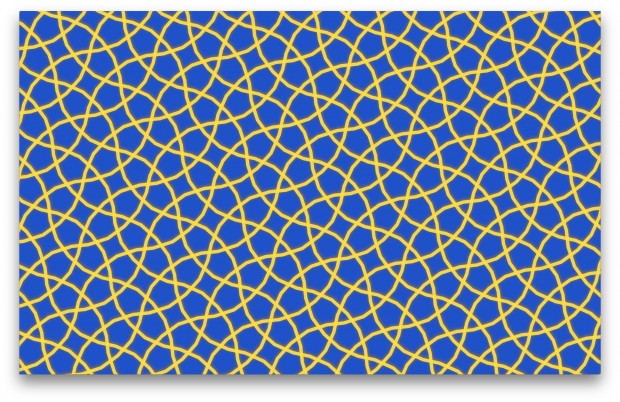
So this App is also useful for creating Penrose Patterns or Ornaments from regular Polygons.
I am curious to see, what you create with it. If you tweet about it, tag it with: #Girih
Please let me know what you like about my Girih App and what not.
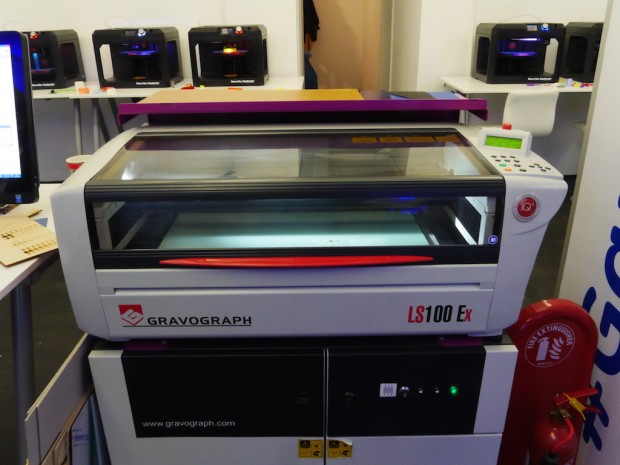
Years after the idea of laser cutting Girih Tiles I attended a laser cutter workshop.
I decided to build upon an existing file rather than using my own old SketchUp files, because of two features:
Engraving and the ‘Teeth’ pattern on the sides.
You can find the file for laser cutting girih tiles in the blog of Johanna Grönqvist.
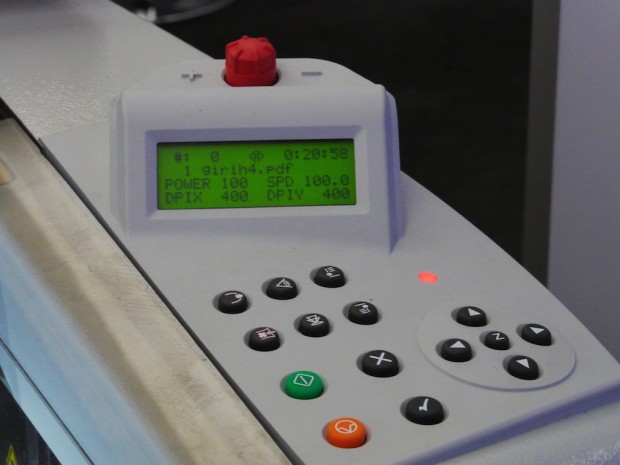
I had problems to use this file with the software, that came with the laser cutter. Most tiles where absolute correct, but a few did not have the engraving filled. I tried exporting different file formats including PDF, EPS and DXF. With DXF nothing was filled.
The next try was not using that laser software, that could not read PDF correctly. Instead I used just the Windows printer driver to access the laser cutter from the Adobe Acrobat Reader, which can certainly read PDF files correctly. The preview in the print dialog looked OK, but the first output was a big failure. The output had a wrong aspect ratio and wrong scale. So the result was completely unusable.
For the second try I only changed the dimensions of the PDF to the working area of the laser cutter (600 mm x 300 mm), without rescaling the content of the drawing.
And that finally worked well.
In 2012, while I was designing my LED installations at home, I started about placing the LEDs in circles in circular arcs.
At that time I had a flexible five meter long LED strip with individually addressable LEDs. (WS2801)
So I came up with five fold symmetries. Later I replaced the circles by regular Decagons.
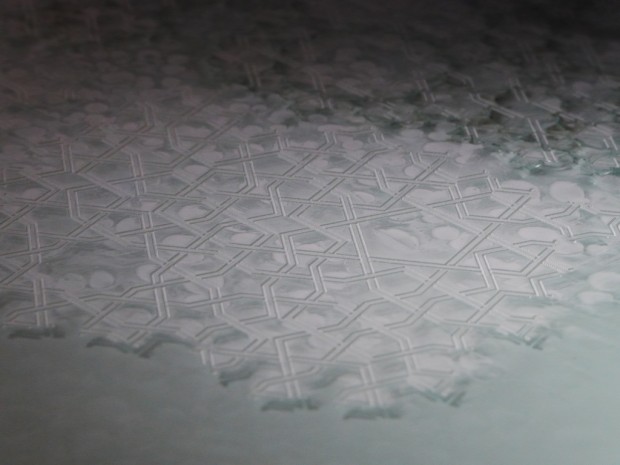
The shapes I was using where a subset of the Girih Tiles. I like the infinite possibilities to tile a plane without a gap with those tiles. And I also like that each tile has the same side length.
I used SketchUp for my designs. The construction of different variants ornaments with many tiles is quite tedious there. So I wanted to cut those tiles with a laser cutter from acrylic sheets.
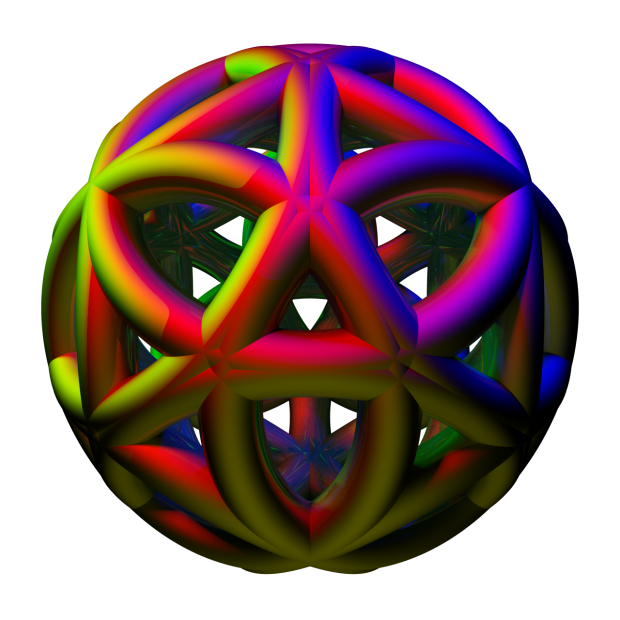
Today I attended a 3D Printing Workshop, where I had to design a 3D object with a for me totally unknown browser based software. After playing around with some shapes builded with polygonal pyramids I decided to start another design using a combination of rings.
I liked my creation so much, that I rebuilded it with a for me totally known text based software.
And this is the result:
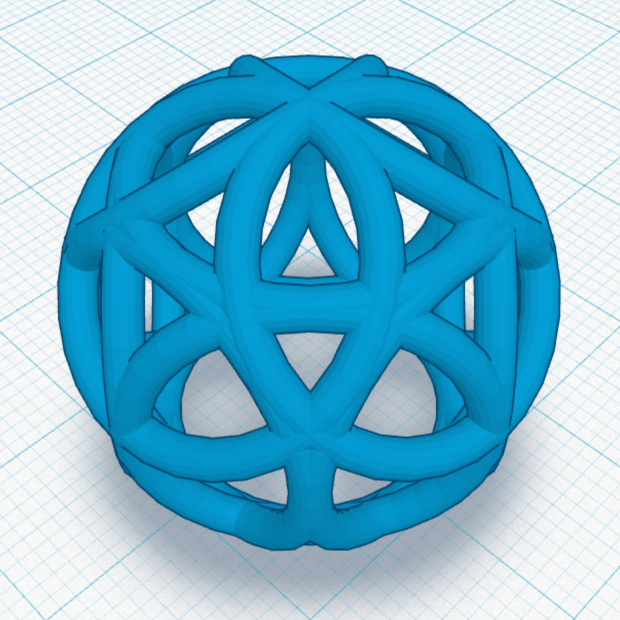
3D Print:

This is the first official video of riding with the Trafo-Pop LED Jacket in Berlin at night on bikes.
This LED Jacket is illuminated by 100 LEDs.
Each RGB LED can be individually controlled to glow in one of 16 million colors.
The LEDs are connected to one Arduino Nano micro controller and powered by a rechargeable lithium battery, which can last a day and night.
Software (written by me) is running on the Arduino, which calculates colorful animations or shows predefined still images.
Take part at: trafopop.com
Trafo Pop and K.I.T.T. on SAT 1.
If you wanted to experiment with lamps in the past you had to choose those small 6 Volt light bulbs, which where used in the old wooden radios as backlight for the glass channel scales.
The same small bulbs are still used nowadays in bicycle tail lights. And there you can see at once one of the many problems of lightbulbs: They all shine in only one color, namely white.
But if you want to see red light for a bicycle tail light or for a traffic light, then you need for each color a separate color filter made of glass or plastic.
For coloring small glow bulbs you can manage this with a coating of dip lacquer, because they do not get too hot.
Maybe you can now imagine, what a sensation is was, for the first time to hold a precious Light Emitting Diode in your own hands.
The LED shone red, much purer than you were accustomed from the bulb. And all LEDs illuminated all in the same beautiful saturated red, more evenly than one was able with incandescent bulbs.
There were no LEDs in other colors. It took a while to that you also could buy green LEDs. But they where not as bright as the red LEDs.
And with the green ones yellow LEDs also arrived, because yellow can be mixed from red and green. Orange was also possible in this way, but it was not as popular. For home use red, yellow and green were at first enough to experiment with for example own traffic lights.
But what was missing for years, was a blue LED.
Meanwhile some automobile manufacturers started to replace the incandescent indicator lights in the dashboard with the more durable and thus more reliable LEDs. Only the high beam indicator light had do be a light bulb, because blue was required, until time finally for the first VW temporarily obtained a special permit and was allowed to equip vehicles with a yellow high beam indicator lamp.
Long since television remote controls with infrared LEDs had replaced the unreliable ultrasonic remote controls. But we hat had still to wait for blue LEDs.
In cities billboards were placed occasionally, with pixels of red and green LEDs that could shine in three colors: red, green and orange. Since the brightness of the green LEDs was improved meanwhile, but also the brightness of the red LEDs. This resulted in a mixed color of red and green, not yellow, but orange.
And then finally the right materials for the production of blue LEDs where discovered. In the beginning blue LEDs where really expensive. You could buy it. But they have hardly been used due to their higher price.
Thank to the blue LEDs it is now possible to produce RGB LEDs, where three LEDs (Red, Green and Blue) where combined in a transparent housing with separate wires to switch each color on and off separately. In this manner a RGB LED can also light up in Cyan or Magenta. Also white light is possible, if the maximal brightness of the color components is well adjusted.
Luckily the price of the blue LEDs dropped. And the manufacturers of electronic devices, such as monitor, PC or HiFi made it their fashion, now to incorporate distinctive blue LEDs instead of the previously often simple green power indicator LEDs.
The production of LEDs was now so well mastered that especially blue LEDs with a very high brightness were achieved.
This and the development of the white LEDs made it possible to use LEDs also for energy efficient flashlight and more and more for traffic lights.


